|
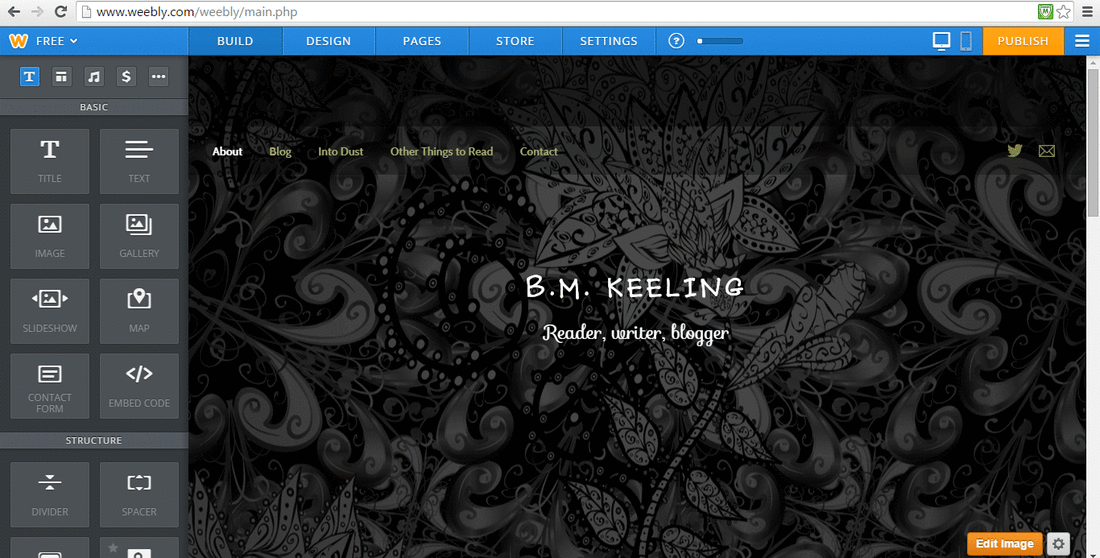
The above image is what the screenshot of my editing page in Weebly looks like. It's rather large but I decided not to shrink it down so you can take a good look. Now, although a few people have asked me about how I went about setting up this website, I know that this post will have a limited audience. So if you are not interested and about to head off - toodle oo and I hope to catch you again soon. But to those of you reading on, I will begin by saying that I am no expert. In fact, the whole idea of a website, a blog and a Twitter account terrified me so I set about it as I do everything to do with my writing: slowly and one step at a time. I read a few articles in Writing Magazine and Writers' Forum and spoke to those of my friends who have websites already. Then I tried to research on-line how it all worked. I have to say, I got very confused. Do I use Wordpress, Blogger or Weebly? Do I have a self-hosted website? Do I purchase my own domain name (and, if so, HOW??) I nearly drove myself potty trying to get to the bottom of it all. In the end I went for Weebly simply on the basis that a friend had said she'd started off with Wordpress and found it too difficult so had abandoned it in favour of Weebly. This friend has a similar level of technical know-how as me (ie none) and about as much free time (ie mainly during toddler naps) and I trust her judgement. Weebly offers a free package (as do most of the other providers) so there was nothing to lose in taking a look. I am aware, however, that this is not necessarily the majority view. Many millions of people use Wordpress and with stunning results. As I did not go down that route, however, I cannot comment on how beginner friendly it is but I did find this guide on the internet: click here . I know that there are plenty of books and magazine articles dedicated to website design and implementation but I am on a budget and this was an area I decided to try to do as cheaply as possible using free resources available. The next step I took was to set myself up with my laptop, a notepad and pen and a very large coffee and I watched the beginner's guide to Weebly (available here). It is an hour and four minutes long but I watched it all the way through and took copious notes. It told me pretty much everything I needed to know although there are plenty of additional help sheets available if I have questions (here ). I found the whole thing to be incredibly user friendly and I couldn't wait to get going. However, it became clear to me while watching the video that I hadn't really thought through what I wanted my website to look and read like. I didn't have a folder of images ready to upload and I hadn't written any of the text. Now, with the free Weebly package you are allowed to have five pages. I decided to begin there. I would name my five pages and then start writing up each page. You will see that I selected 'About', 'Blog', 'Into Dust', 'Other Things to Read', and 'Contact'. Once I had this in my head, I established my Weebly account and had a look through the different designs on offer. There are dozens of them, even with the free package. Many of them are geared towards more commercial enterprises than writing but after a while I found one with which I was happy. (I should probably say here that you can just have a basic blog. You don't need a static website with multiple pages but I wanted somewhere to post elements of my writing.) I then needed some graphics (cue several hours reading up on graphics for websites).  Sourcing the graphics slowed me down again. I spent some time looking at other websites, those belonging to writers and book bloggers in particular, and was astounded by the quality of the images in use. Many had their own personally designed logo. So I set to work on the 'About a Book' logo and had great fun messing about with it. The floral/gothic image which sits behind the title on my home page is a design which I acquired from Shutterstock. I knew that I was going to need some professional stock photography and graphics for my book cover so I purchased a bundle of five images and allocated one of them to the website. It was at this point that I decided to invest in Photoshop. I was tired of trying to work out how to size images for the web. The last thing I wanted was a page of graphics which were of a file size so large that the pages took ages to load. My reading told me that the standard jpeg format is on the large-ish size and is generally of a resolution far higher than a computer monitor is capable of displaying (basically a large file size would slow down my web page for no end gain). What I needed to do was save my pictures in the GIF format. I managed to do this using some free software but as I wanted to edit my images as well and, ultimately, design my own book cover, I decided that Photoshop was a worthwhile investment and would also be lots of fun. It also has a handy little 'save for web' button that neatly reduces all the file sizes of my images and gets them ready for uploading to my website. I read a few blog posts on sourcing images for the web and they referred me to a number of different websites which allow people to use images for no payment. A word of caution here - do not infringe copyright. It is always easier to take your own photographs or draw your own art as you don't have to worry about whether someone else has any rights to it. I have dug around all my old photographs and drawings and even pictures which my mum produced thirty years ago which look stunning scanned in. (Also some of them she drew when I was only three months' old and I love the idea of using material she produced while I was a sleeping baby. See 'Hoggie' below.) I know I can use these risk-free and I'm now constantly on the look out for photo opportunities. If you need something extra, there are plenty of companies offering images for use for relatively low fees (i-stock, Shutterstock etc) but make sure you read the licence terms before downloading and using. If you use one of the free sites (eg Morguefile), make sure you read the terms of use carefully. In relation to the book covers and movie posters I have used on my site, I have taken the view that the owners of those images are unlikely to object to them being used in circumstances where the product is being promoted. After all, it is free and effortless advertising for them. Technically, however, it is probably an infringement, at least in the U.K.. Once I had my web pages labelled, had selected my preferred design layout and had my images ready, I was good to go. You will see from the picture at the top of this piece that there are boxes down the left hand side of the page in the Weebly 'editor'. These are 'elements' which you drag and drop across to your web page as you are building it. They are 'text', 'image', 'title' and so forth. The tutorial makes it clear how these are used and I have found it to be very easy on the whole. When I had finished designing the website and just before I published it, I decided to purchase my own domain name. For a relatively small fee per annum I could take the 'Weebly' out of it (it was www.bmkeeling.weebly.com and now it is just www.bmkeeling.com). I decided that if I was going to put it on my book cover and marketing material I would prefer the shorter version. I then hit 'publish' and it was done. One last thing I will mention - the box for subscribing to blog updates via email which you see on a number of my pages (go on...fill it in!) is not a Weebly tool. I had to set up a Mail Chip account and copy and paste over a small block of code which Weebly allows you to do easily by dragging the 'embed code' box over to your web page. The only hiccup I experienced here was that I had not realised that Mail Chimp displays your postal address whenever someone signs up. After a call from a helpful Aunty and much panic-reading of internet articles I concluded that it is a legal requirement. I also checked with Mail Chimp who confirmed this. As I have no address other than my home address I had to set up a PO Box number to get around this issue but I managed to do this for free with a company called UKPostbox.com. I use Mail Chimp for emailing out the blog updates. 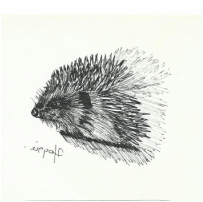 Hoggie (1977) (c) Barbara Pope Hoggie (1977) (c) Barbara Pope So, it isn't perfect and I don't know much more technical wizardry than I did before, but I am pleased with the result. It is all mine, from the text to the images and I have had great fun putting it together. I would urge anyone interested in starting a blog or using a website to get their writing out there to give it a go. In the meantime, the preparations for the launch of Into Dust are going well. The manuscript is getting a copy-edit, the book cover is finished and I've decided to have bookmarks printed. Once the manuscript is ready for uploading to CreateSpace I will post again about how that process is going. 18/6/2015 12:45:20 pm
Wish I had taken the time to do researches like you. I rushed into choosing a platform for my website and now I have to deal with the aftermath. :@
Reply
Diana
18/6/2015 01:38:17 pm
Once again, Bernie, you point the way. You're becoming the 'go-to' web site for new authors. Or .... you certainly should be. Let's spread the word!
Reply
barbara pope
26/6/2015 04:21:36 am
Love the new Into Dust update.
Reply
Leave a Reply. |
Bernadette KeelingI love most types of fiction - crime, mystery, fantasy. Oh, and historical fiction of course and middle-grade books and, well, you get the picture. Subscribe for Blog updates via email:Categories
All
Archives
April 2019
Unique, handcrafted items for readers and writers:
|
B.M. Keeling
