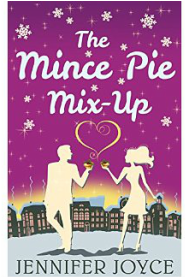
 The Mince Pie Mix-up - published by Carina on 6th November 2015 The Mince Pie Mix-up - published by Carina on 6th November 2015 TODAY ON THE BLOG I welcome Jennifer Joyce and her luscious new book The Mince Pie Mix-Up. I am delighted to have her here and hopefully her tale of success will motivate and inspire other writers (as well as me). So, here goes... Hi Jennifer, thanks for agreeing to be interviewed on my blog! It’s great to have you here. Hello and thank you for having me! We first ‘met’ on Twitter last year and I have been delighted to follow your progression from self-published author to your recent deal with Carina (Congratulations, by the way!). I was going to do a piece on you as a ‘spotlight on a self-published author’ but as you are now a fully-fledged traditionally published writer, I will have to change the title! As someone who has been involved with both publishing routes, your experiences will be of interest to many of us writers. Shall we start from the beginning and work our way to The Mince Pie Mix-Up? Thank you! And yes, that sounds like a good plan to me. Can you tell me when you started writing? I’ve always made up stories, scribbling them down on bits of paper and filling up notebooks when I was younger. When I was around ten, a teacher took us to our local library where a children’s author was doing a talk and I remember sitting there thinking this is what I want to do when I’m older. It hadn’t occurred to me before that I could write actual books. You have self-published two novels, A Beginner’s Guide To Salad and Everything Changes But You.Tell me a little about the experience with those two books. Did you seek a traditional publisher or did you fancy going it alone from the beginning? I’ve always wanted to go down the traditionally published route and I’d never planned to self-publish. But when I wrote and submitted A Beginner’s Guide To Salad to agents and received rejections (some were lovely, encouraging rejections but rejections all the same), I knew I couldn’t give up on it. I loved writing the book and I adore my main character, Ruth. I couldn’t shelve her so that’s when I decided to look into self-publishing. Ruth was going out into the world one way or another! As I’d already self-published my first novel, I did the same with Everything Changes But You. I know you designed your own covers, how have you found doing everything yourself? What lessons have you learned and what have you enjoyed most about it? I’ve had to learn everything from scratch as I had no idea how to design a cover. There was quite a bit of head-scratching when I first opened the program as it looks so complicated. Even the ‘helpful’ guide had me baffled! So I decided to jump in feet first and learn as I go. It seems that every time I open the program (I use Gimp, a free program that’s a lot like Photoshop) I learn something new! Although it can be frustrating at times when I can’t figure out how to get what’s in my head on the screen, I loved making the covers and even make them for the short stories I write for fun on my blog. I love playing around with images, colours and fonts until I find the one that fits. 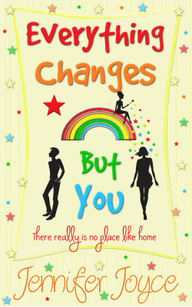 Do you have any other books in your top drawer awaiting rescue or were these your first two book babies? I’m not sure I want to even think about the monstrosities I wrote (and submitted) before A Beginner’s Guide To Salad. They were awful and won’t be seeing the light of day as they are far beyond rescue! I see you have some short stories on your website, did these come before the books or were they something that you did later? I wrote my first short story for my blog for Christmas 2011, when I was still writing and submitting to agents. It was just for fun but pressing submit on that first one was nerve-wracking! I like to put short stories on my blog at Halloween and Christmas as I love these times of year so it’s great to write about them. Can you give me 5 bullet point tips for self-published writers?
How did the deal with Carina come about? You must be absolutely delighted! I am stupidly delighted! I started writing The Mince Pie Mix-Up last November and was planning to self-publish it as I had with A Beginner’s Guide To Salad and Everything Changes But You but decided to take a chance and submit it to Carina as you don’t need to have an agent. I was stunned when I was offered a two-book deal with them. Can you tell us a little about the book, without any spoilers of course! The Mince Pie Mix-Up is a bit like a festive Freaky Friday. Judy and Calvin both think their other half has an easier life. Calvin works full-time for a mean-spirited boss who is constantly breathing down his neck while Judy ‘only’ works part-time at the local village tearoom. Judy bears the brunt of the childcare and wishes Calvin would help out more around the house. One night, they’re given the opportunity to swap lives over the festive period and they take it! So, what’s next?? Carina will be publishing another romantic comedy early(ish) next year. The story revolves around Delilah James as she tries to find a date to take her oldest friend’s wedding. Thanks Jennifer. The best of luck with all your books and I am looking forward to seeing what happens next! Thank you so much for having me on your blog! Jennifer has a lovely website over at www.jenniferjoycewrites.co.uk where you will find details of all her books and her Facebook and other sites. I follow her on Twitter via @Writer_Jenn.
 The first story from 'Into Dust' is available free on this website on the Into Dust page (click HERE) until Halloween. It is the first supernatural story I wrote and really got the whole thing going. I hope you like it. 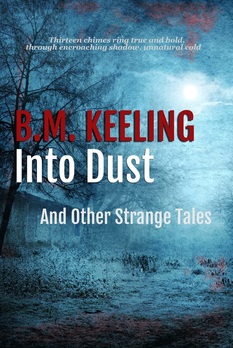
While I was researching how to self-publish a book, I kept coming across the same advice over and over again - don't design your own cover; don't design your own cover...
The message was clear: a bad cover can kill a book and it is worth the money investing in a professional design. Whilst I could see that a bad cover could impede sales, I still wanted to have a go myself so I spent a few weeks mulling it over and investigating further. First, I discovered that the cost of a professional design was likely to be significant in the overall scheme of the money at stake. I knew I wanted to spend on an editor and that there was already little chance of me ever making back the cost of that alone. Adding the cost of a cover into the mix would have meant that I would be unlikely to ever recoup the funds expended. Also, I really wanted to give it a try. I'm not really artistic. I mean, I can draw adequately and studied art at a basic level at school but I'm nowhere near a professional standard. Still, I like creating things and learning new skills. But I was aware that the DIY route would come at a cost too - I'd need new software and stock imagery to play about with. And I knew nothing (I mean absolutely zero) about using computers in design. I could have told you that a JPEG was a photo and that's about it. GIF's TIFF's, PNG's, dpi's, file size - all completely foreign to me. Dilemma...
I had just about conceded defeat (I mean, why spend a hundred quid on image software and pictures when in all likelihood I'd then need to pay someone to do it properly once the stubborn part of me finally conceded that I needed help?) so I sent out a tweet that I was giving up. Within minutes a lovely and supportive reply flew back from Jennifer Joyce, a fellow self-published writer (find her on Twitter under @Writer_Jenn) who told me not to let anyone put me off trying something if I thought I would enjoy it. I remain grateful for that tweet because I persevered and ultimately produced a cover of which I am rather proud. Okay, it did cost - the images came to about £40 (from Shutterstock) and I ended up acquiring Photoshop (around £60 - a gift from my husband for our anniversary) but the end result looks (almost) how I wanted it to. Plus I didn't have the stress of dealing with a third party over something which I felt strongly about (often a recipe for disaster), it still came out cheaper than paying someone else to do it and now I have Photoshop for use in other projects. Perhaps, in the future, if sales ever justify it, I would outsource cover design but while I am still on a shoestring budget I now have the confidence to give it a go myself. Here's how I got there:
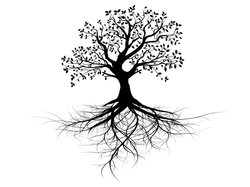 Image no.1 Image no.1
I read the following posts:
1 http://www.erindorpress.com/2014/03/readers-will-judge-your-book-by-its-cover/ 2 http://www.creativindie.com/how-to-make-a-full-print-book-cover-in-microsoft-word-for-createspace-lulu-or-lightning-source/ 3 http://www.thecreativepenn.com/2013/10/20/book-cover-design-ms-word/ and another one which I can't find any longer, which is a shame as it probably left the greatest impression on me. In the missing article, the writer had wedded himself to an idea at the outset - a particular image, as I recall, and he couldn't get it out of his head. He tinkered and tinkered with it but just couldn't get it right. In the end he admitted that the image was wrong and went in a completely different direction, producing a much better cover. As someone who was insistent upon a certain image/style until I finally gave in and acknowledged that it wasn't working, this post gave me the push I needed to go in another direction. I also had a look at CreateSpace's 'Cover Creator' (accessible via the website; KDP has one too but obviously not for a cover encompassing a spine and back cover). This should be investigated at the outset as you may be happy using one of the standard designs on offer. It wasn't for me, though (but see below as to how it did come in handy). After reading these articles I spent a while online and in book shops gathering pictures of covers I liked. I measured them, I studied them and tried to reproduce them in spirit. What I discovered was that I was drawn to illustrated book covers. Not necessarily fancy ones but silhouettes, shadows, abstract patters, that sort of thing. What I didn't like were photographs. So I finally took the plunge and downloaded an image from Shutterstock to play around with in Photoshop (see 'Image no. 1' above). 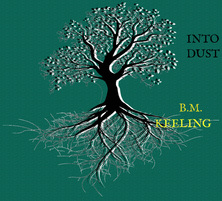
I printed it out and mocked up a cover, folding the paper so that the image of the tree spanned the front, spine and back and I added text by hand. I carried it around with me for a few weeks but something was nagging away and it was this: I had read somewhere that the cover should compliment/reflect those usually used in a genre but still stand out. So, if most books in the category of ghost stories, for example, had illustrated covers then go with that but if they used photographs then the advice was clear: don't try and buck the trend or you might put off potential buyers.
I went back to Amazon and discovered that many collections of ghost stories had photographic covers or very basic designs using blocks of colour. No fancy illustrations. Also, by this stage I was beginning to acknowledge that the tree wasn't looking as good as I had hoped, particularly after the text was added. The image was off, the fonts were off.
I addressed the font issue with these articles: http://www.thebookdesigner.com/2011/08/5-great-fonts-for-book-covers/ https://www.createspace.com/en/community/docs/DOC-2021 and spent some time on the Font Squirrel website, downloading free fonts (making sure they were free for commercial use). I printed off pages of text (my name and book title) in each of the fonts I liked best and ended up selecting Fjalla. I then went back to Shutterstock. My £40 had bought me the rights to use 5 images and so far I had only downloaded the tree and the gothic flower pattern used on this website. I looked at a couple of photographs and asked my husband what he thought. I selected one, played around with it a bit, cropping the picture, adding a few red brushstrokes in places and inserting text. It started to come together quickly and I could see what a vast improvement it was on my first effort. (I should say that before I acquired Photoshop I downloaded and tried to get to grips with GIMP - a free image manipulation software. It was pretty good but as a novice I needed a lot of help and found instructions difficult to come by. Photoshop, however, is so widely used that it was easier to work out what to do. If you have any level of existing knowledge, though, GIMP may be just fine and save you £60 or so.) 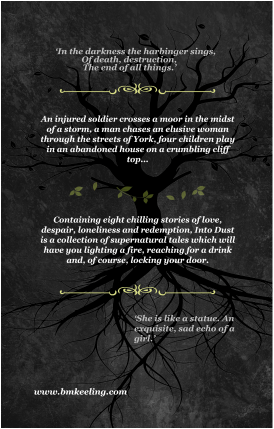
Once the front cover was done I had to pull together the back and the spine. This is where I found Amazon's Cover Creator very useful. Whilst I hadn't wanted to use one of the many standard covers available (where you basically use a set layout and upload your own picture and text in the boxes indicated), they had a 'blank' cover which essentially just sets out where the spine of your book and the bar code should be. I was then able to upload my front, back and spine and make sure that it was all in the right place.
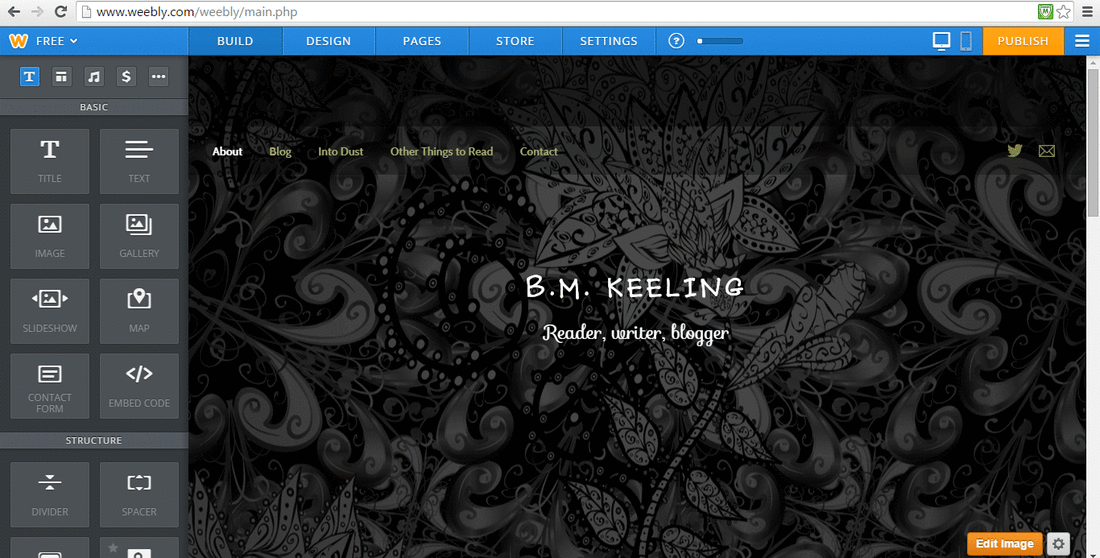
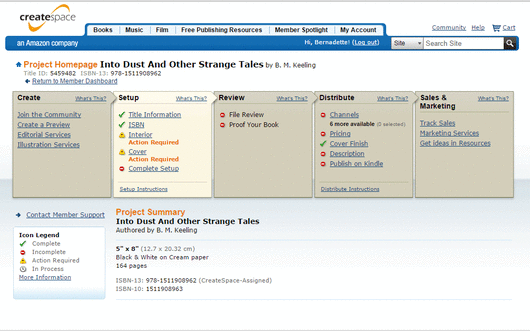
One final point I would make is this: I was pleased with my final JPEG onscreen but when it was printed by CreateSpace the print quality (in my opinion) didn't do justice to the design. This has been true on every copy printed. The tree on the back cover is barely visible - it just looks muddy. I know it is not a fault with the file - it is of a superior resolution and I had bookmarks printed professionally using the same file and they are excellent. Anyway, I hope this helps you if you are thinking of giving it a go yourself. Good luck and remember Jennifer's advice! Goodreads Book GiveawayInto Dust And Other Strange Talesby BM KeelingGiveaway ends October 16, 2015. See the giveaway details at Goodreads.  Now that I have completed my first foray into the world of self-publishing (the technical bit, anyway; the marketing is still to come) I thought that I would share the hiccups I encountered and how I (mostly) got past them together with the aspects that I found to be easier than anticipated, as it can be all too tempting to part with money when perhaps you don't need to. Things that I found easy: 1 Using the Word template which I downloaded from CreateSpace. I had no problems pasting my work into the template, messing around a little with font and line spacing and inserting blank pages where necessary to ensure that each new story started on a right-hand page. Simplicity itself and no corruption once I uploaded it into the system. I even got confident enough to insert drop caps at the beginning of each story and a deliciously gothic swirl on the title page. 2 Completing the tax information. I had been dreading this as I had read that I'd need to telephone the US to get a number (an ITIN or EIN or something, I never really got to the bottom of it) but it turns out that the system has been updated so that all you now need to do is fill out a few simple questions online and provide your UK NI number. Easy peasy. 3 Changing things - I uploaded dozens of versions of my interior manuscript and my cover. Each time took a couple of minutes and I was soon so used to it that I felt I could experiment with different ideas and see how they looked. Nothing is permanent until you say so. 4 The cover. OK, creating the cover wasn't simple (I'll do a separate post on how I produced mine) BUT CreateSpace really does give you the tools for at least having a go yourself. If you surf through the 'Cover Creator' you can select one of a number of standard layouts into which you insert your pictures and your text. Many of them look formulaic, however, and as I wanted something slick I was delighted when I reached the end of the list of possible covers and found one which was essentially blank but gives you the correct overall dimensions and assists with the placing of the spine. I therefore took the dimensions into Photoshop and created a full cover there. When I then imported it back to Cover Creator, I could use the guidance provided to ensure that the spine and barcode were in the correct place. Things that I found difficult: 1 Getting started. Those first few weeks reading everything I could lay my hands on about the process really confused me. Looking back I'd have been better reading less and just having a go. As it turns out I didn't need much technical know-how and mysterious things like gutter margins and print bleed were taken care of by the Amazon templates. 2 I was pleased with the JPEG I produced for the cover (front, back and spine) and it can be viewed HERE. However the print quality of the covers produced by CreateSpace isn't perfect. They did replace the proof copy, saying that it was printed outside 'acceptable parametres' but there was no improvement and all copies have been the same. Basically the tree isn't visible on the back cover. I love the inside of the book though. I think the cream paper looks good and suits the mood of the stories. 3 The biggest hiccup I had was in the conversion from CreateSpace to Kindle. My reading had led me to believe that this would be easy. Just press the big blue button, everyone said, and Amazon will do it for you. Well, not really. I pressed the button and the e-version which was produced was riddled with errors. The table of contents was all over the place, the gothic scroll at the front was off centre, the drop capitals had gone haywire, indents were erratic. It looked unprofessional. I am sure these are easy to fix if you know anything about computers, coding and perhaps something called Calibre (?) but to a technical dummie like me with very limited time available, it was a nightmare. Here's what I did: a. I removed the manual table of contents used in the CreateSpace document and inserted an automatic one using the Word function. I used the 'Heading 1' style to create the title for each story and linked up the TOC using this method. I still had problems though. Depending on where I clicked on a story heading in the TOC, only certain words from the title would show up when I was taken to the story. For example 'Beneath the Brushwood' became simply 'Brushwood' and 'We All Go the Same Way Home' was just 'the Same Way Home.' b. Cue more headscratching and searching of the Blogosphere. In the end I removed the centering from the headings and relinked them to the TOC and that seemed to work so bye bye pretty centred headings. c. I removed the gothic swirl and the drop capitals. Basically I stripped out anything remotely fancy which was fine for a book like mine but made me realise that anything with graphics would be a lot trickier. d. That seemed to sort most of it. It looked pretty good on the Kindle... and Android (there is an 'internal reviewer' accessible via your KDP account which simulates reading experiences on a multitude of gadgets) but why oh why was it wonky again when viewed through the Ipad simulator? Back to the Blogosphere where I learn that the Amazon system doesn't work so great with the Apple system. Fabulous. In the end there was nothing I could do about the fact that the title page was displaying in a much smaller font than was really appropriate (I'm sure people with more know-how could have fixed it) BUT the system had indented ALL of my paragraphs. Even my first lines. Now this I struggled with as it looked like I just didn't know the rules of grammar or formatting or whatever you want to call it. So I searched and searched again until I discovered this article: http://www.cjs-easy-as-pie.com/2011/03/how-to-avoid-kindle-automatic-first.html which explained to me that the indent was only inserted where there was no existing indent. So if I inserted a tiny indent, the smallest you can manage on your system, then it will override the automation. It means that the first lines will be slightly indented but visibly less so than genuine indents for new paragraphs, dialogue etc so at least there is a difference for the reader. I tried it (instructions as to how are in the article) and it worked sufficiently well for me to finally admit that it was as good as I was going to get it and that I was ready to go. To be honest, I was actually pretty chuffed with it by this stage. Massive thanks to the person behind that article. e. When I finally went live with it, the 'Look Inside' feature gave me a headache. On both the print and Kindle versions, Amazon had made the table of contents 'live' by inserting hyperlinks but the links ran straight through the centre of the story titles making it look as though they had been struck out. I was beginning to get frustrated at this point as I had gone to such pains to appear professional yet there were glitches occurring at every stage. But then I took stock and reminded myself what a wonderful facility it is overall, even if quality control is lacking in places. In the end I complained via the message centre who confirmed that I could ask for the links to be removed or fixed. I did this a couple of weeks ago but it has still not been fully remedied. And am I happy with the final product? Well, yes, I am. I am pleased with and proud of the stories and I can live with the quality of the cover. It looks great electronically and I suspect I am being fussy over the print. The print still offers a wonderfully tactile experience, with yellowed pages which remind me of the books I used to read as a child. I read the proof copy cover to cover in just over 2 hours when it arrived and I had tears in my eyes at the end. So yes, I am happy with it. The challenge now is to get it out into the world and begin to discover what other people make of my little labour of love. Good luck with yours and if you think I can help, just ask. x 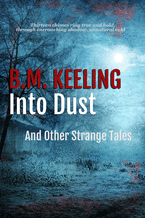 UK paperback HERE US paperback HERE UK e-book HERE US e-book HERE Easily found on all Amazon and Kindle websites globally by searching under 'BM Keeling'. ’In the darkness the harbinger sings, Of death, destruction, The end of all things.’ An injured soldier crosses a moor in the midst of a storm, a man chases an elusive woman through the streets of York, four children play in an abandoned house on a crumbling cliff top... Containing eight chilling stories of love, despair, loneliness and redemption, Into Dust is a collection of supernatural tales which will have you lighting a fire, reaching for a drink and, of course, locking your door. 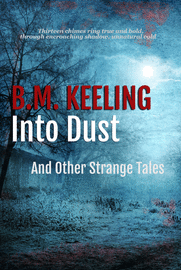 Just a short post today to mark the rather momentous moment (for me, anyway) of finally seeing my book up for sale on Amazon and Kindle worldwide. Regular readers of this blog will know that I had planned on releasing the title in September, when people were back from their holidays and the weather was closing in. But the more I thought about it, the more sense it seemed to make to just get it out there. By publishing now I get to have a 'soft opening', if you like. I can still have the big marketing push (such as it will be) in autumn but in the meantime I can gather a few reviews, speak to libraries, deal with any issues which crop up in relation to Amazon. After all, isn't one of the perks of self-publishing that your book is there for as long as you want it to be? As a self-published author, you are not competing for shelf-space in a book store, your title isn't going to be cast aside if it doesn't fly off the shelves in the first few weeks. This way I get a little extra time to get used to how everything works. I was glad I had chosen to go ahead early within a few hours of publishing the paperback. As part of my thorough preparation I had read that the next step, the incredibly important step that takes me from paperback to e-book, was actually quite easy thanks to a new Amazon/CreateSpace programme which does everything for you. All I had to do was hit the big blue button which said 'I want to publish this title on Kindle'. Hmmm, right. Big blue button hit, heart in mouth, totally wonky document comes out the other side. Cue several days of head scratching and searching through Amazon discussion forums which were waaaaaay over my head in terms of technical speak. In the end I stripped anything vaguely fancy out of the document (bye bye pretty gothic swirl and drop caps) and found a few tips on writing blogs which I will share with you in another post. In the end I came up with a result that works (by the way, did you know that even if you nail the formatting for Kindle, chances are it will show up differently on Apple devices?). In the end I am hoping that it is the stories that count but I am finally satisfied that I have produced something which looks as professional as I could have managed with the skills and facilities that I have. Now I just need to find some readers. Spooky, gothic, mysterious tales, anyone? UK paperback HERE US paperback HERE UK e-book HERE US e-book HERE Easily found on all Amazon and Kindle websites globally by searching under 'BM Keeling'. Well I am back from my holiday and preparing for the run in to book launch day! I still haven't quite decided on a date; it will be dictated to some extent by how the next stage in the process goes. At the moment, though, I am still aiming for mid/end September.
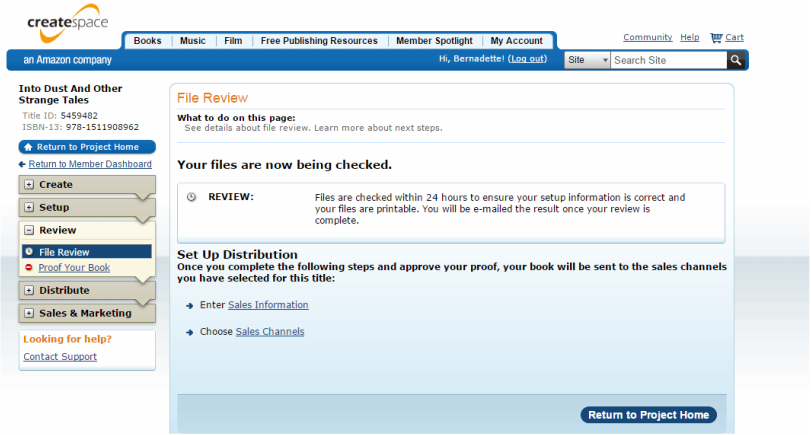
You will see from the above screen shot that I have taken the big step of submitting my files (interior manuscript and cover) to CreateSpace for review. (For anyone who needs reminding, this is the branch of Amazon which produces the physical books rather than the e-books.) This is hugely exciting. The process takes about 24 hours, I believe, during which time they check for glaring errors in presentation. Then I can review it as a whole on screen (up to now I have only been able to review the interior and the cover separately) and I get to see whether the tricky issue of getting the spine in the right place has been successfully managed. Here's what has been happening recently to get me to this position: The manuscript came back from my proofreader while I was away. There weren't too many changes, although it seems that I have a problem determining when to use one word, a hyphen, or two words. His eagle eyes also saved me from at least two errors which would have been embarrassing. The lesson here - get your manuscript edited, even if it is only at the very basic proofing level. Another blogger, the very lovely Astrid Arditi, has written an excellent piece on the different levels and types of editing available and I would recommend it to anyone thinking of self-publishing, It can be found here. Even my own proofreader didn't think I needed his services after looking over two of the stories but I insisted and I am glad that I did. The person I used is a long-standing friend and I suspect I was given 'mates rates' but it was still a significant investment for me in the context of publishing a book which I hope, one day, will at least pay for itself. It will take around 130 sales to pay for the edit alone and this will be no mean achievement. I will need around 250 sales to roughly break-even (cost of edit + cost of stock images for cover + sundries). Still, in terms of the edit, my reputation is at stake and it was the right thing to do. Anyway, making money is not the main reason for doing this at the moment (right?!). The intention is to publish a number of titles which will hopefully then gather some momentum. In the meantime, the experience I am having is exciting and educational and is already beginning to open doors for me. So - onwards. I will now have to be patient and wait for CreateSpace to work it's magic and tell me whether my book is ready for review. I will then scrutinize it on-screen and then I have a decision to make. This decision is whether or not to order a physical proof copy of my book before it goes live. Given how much trouble I have gone to to get this far, then the obvious answer is to purchase one. The problem is that CreateSpace only prints them in the US (even though the books will be printed locally once published). There are therefore delays and shipping costs to consider. Fortunately I have given myself plenty of time and it should only cost about £8 (hang on, that's another 12.6 books I'll have to sell!) so my thinking at the moment is that I will do it. (Pricing is interesting. I have just discovered that for each £4.99 book I sell I will get 68p. What do you think of the price? It will be 166 pages long. The Kindle version will probably be priced at £1.99.) Timing is still an issue, though. I have spoken with a few libraries who have informed me that they need a number of weeks (6-8) to approve a book and I really would love it to be part of the Halloween display at my local branch. Also, a few advance readers would be useful so that I can get some reviews ready to go (although some reviewers seem to accept e-files so that might be less of a problem). As an author I can order up to five proof copies of my book so perhaps I will order one, see if I am happy with it and then order a few more to go to the libraries but it might be that I have to put the book live earlier than I would like just so I can get it reviewed by libraries in time. If anyone out there has any experience with this do let me know. I suppose in most situations it is not a problem - an author would simply publish and then ask the libraries to review after that date. It is only because I am trying to tie everything in with Halloween that it is becoming complicated. One thing that I should mention is that CreateSpace offers a free service to automatically publish the book to KDP (Kindle Direct Publishing) once it has been approved. That means, I hope, that it will take minimal work to put the book live on the Kindle Store. One final point - I have finally entered the world of Facebook. I am finding it difficult but can already see the benefits as I am reaching an audience who just don't participate on Twitter. My page can be found here and I would be extremely grateful for any likes or shares you can send my way - I have a feeling that selling those, er... 262.6 books is going to be tough work! The above image is what the screenshot of my editing page in Weebly looks like. It's rather large but I decided not to shrink it down so you can take a good look. Now, although a few people have asked me about how I went about setting up this website, I know that this post will have a limited audience. So if you are not interested and about to head off - toodle oo and I hope to catch you again soon. But to those of you reading on, I will begin by saying that I am no expert. In fact, the whole idea of a website, a blog and a Twitter account terrified me so I set about it as I do everything to do with my writing: slowly and one step at a time. I read a few articles in Writing Magazine and Writers' Forum and spoke to those of my friends who have websites already. Then I tried to research on-line how it all worked. I have to say, I got very confused. Do I use Wordpress, Blogger or Weebly? Do I have a self-hosted website? Do I purchase my own domain name (and, if so, HOW??) I nearly drove myself potty trying to get to the bottom of it all. In the end I went for Weebly simply on the basis that a friend had said she'd started off with Wordpress and found it too difficult so had abandoned it in favour of Weebly. This friend has a similar level of technical know-how as me (ie none) and about as much free time (ie mainly during toddler naps) and I trust her judgement. Weebly offers a free package (as do most of the other providers) so there was nothing to lose in taking a look. I am aware, however, that this is not necessarily the majority view. Many millions of people use Wordpress and with stunning results. As I did not go down that route, however, I cannot comment on how beginner friendly it is but I did find this guide on the internet: click here . I know that there are plenty of books and magazine articles dedicated to website design and implementation but I am on a budget and this was an area I decided to try to do as cheaply as possible using free resources available. The next step I took was to set myself up with my laptop, a notepad and pen and a very large coffee and I watched the beginner's guide to Weebly (available here). It is an hour and four minutes long but I watched it all the way through and took copious notes. It told me pretty much everything I needed to know although there are plenty of additional help sheets available if I have questions (here ). I found the whole thing to be incredibly user friendly and I couldn't wait to get going. However, it became clear to me while watching the video that I hadn't really thought through what I wanted my website to look and read like. I didn't have a folder of images ready to upload and I hadn't written any of the text. Now, with the free Weebly package you are allowed to have five pages. I decided to begin there. I would name my five pages and then start writing up each page. You will see that I selected 'About', 'Blog', 'Into Dust', 'Other Things to Read', and 'Contact'. Once I had this in my head, I established my Weebly account and had a look through the different designs on offer. There are dozens of them, even with the free package. Many of them are geared towards more commercial enterprises than writing but after a while I found one with which I was happy. (I should probably say here that you can just have a basic blog. You don't need a static website with multiple pages but I wanted somewhere to post elements of my writing.) I then needed some graphics (cue several hours reading up on graphics for websites).  Sourcing the graphics slowed me down again. I spent some time looking at other websites, those belonging to writers and book bloggers in particular, and was astounded by the quality of the images in use. Many had their own personally designed logo. So I set to work on the 'About a Book' logo and had great fun messing about with it. The floral/gothic image which sits behind the title on my home page is a design which I acquired from Shutterstock. I knew that I was going to need some professional stock photography and graphics for my book cover so I purchased a bundle of five images and allocated one of them to the website. It was at this point that I decided to invest in Photoshop. I was tired of trying to work out how to size images for the web. The last thing I wanted was a page of graphics which were of a file size so large that the pages took ages to load. My reading told me that the standard jpeg format is on the large-ish size and is generally of a resolution far higher than a computer monitor is capable of displaying (basically a large file size would slow down my web page for no end gain). What I needed to do was save my pictures in the GIF format. I managed to do this using some free software but as I wanted to edit my images as well and, ultimately, design my own book cover, I decided that Photoshop was a worthwhile investment and would also be lots of fun. It also has a handy little 'save for web' button that neatly reduces all the file sizes of my images and gets them ready for uploading to my website. I read a few blog posts on sourcing images for the web and they referred me to a number of different websites which allow people to use images for no payment. A word of caution here - do not infringe copyright. It is always easier to take your own photographs or draw your own art as you don't have to worry about whether someone else has any rights to it. I have dug around all my old photographs and drawings and even pictures which my mum produced thirty years ago which look stunning scanned in. (Also some of them she drew when I was only three months' old and I love the idea of using material she produced while I was a sleeping baby. See 'Hoggie' below.) I know I can use these risk-free and I'm now constantly on the look out for photo opportunities. If you need something extra, there are plenty of companies offering images for use for relatively low fees (i-stock, Shutterstock etc) but make sure you read the licence terms before downloading and using. If you use one of the free sites (eg Morguefile), make sure you read the terms of use carefully. In relation to the book covers and movie posters I have used on my site, I have taken the view that the owners of those images are unlikely to object to them being used in circumstances where the product is being promoted. After all, it is free and effortless advertising for them. Technically, however, it is probably an infringement, at least in the U.K.. Once I had my web pages labelled, had selected my preferred design layout and had my images ready, I was good to go. You will see from the picture at the top of this piece that there are boxes down the left hand side of the page in the Weebly 'editor'. These are 'elements' which you drag and drop across to your web page as you are building it. They are 'text', 'image', 'title' and so forth. The tutorial makes it clear how these are used and I have found it to be very easy on the whole. When I had finished designing the website and just before I published it, I decided to purchase my own domain name. For a relatively small fee per annum I could take the 'Weebly' out of it (it was www.bmkeeling.weebly.com and now it is just www.bmkeeling.com). I decided that if I was going to put it on my book cover and marketing material I would prefer the shorter version. I then hit 'publish' and it was done. One last thing I will mention - the box for subscribing to blog updates via email which you see on a number of my pages (go on...fill it in!) is not a Weebly tool. I had to set up a Mail Chip account and copy and paste over a small block of code which Weebly allows you to do easily by dragging the 'embed code' box over to your web page. The only hiccup I experienced here was that I had not realised that Mail Chimp displays your postal address whenever someone signs up. After a call from a helpful Aunty and much panic-reading of internet articles I concluded that it is a legal requirement. I also checked with Mail Chimp who confirmed this. As I have no address other than my home address I had to set up a PO Box number to get around this issue but I managed to do this for free with a company called UKPostbox.com. I use Mail Chimp for emailing out the blog updates. 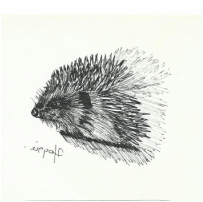 Hoggie (1977) (c) Barbara Pope Hoggie (1977) (c) Barbara Pope So, it isn't perfect and I don't know much more technical wizardry than I did before, but I am pleased with the result. It is all mine, from the text to the images and I have had great fun putting it together. I would urge anyone interested in starting a blog or using a website to get their writing out there to give it a go. In the meantime, the preparations for the launch of Into Dust are going well. The manuscript is getting a copy-edit, the book cover is finished and I've decided to have bookmarks printed. Once the manuscript is ready for uploading to CreateSpace I will post again about how that process is going. Updated 28/05/2015 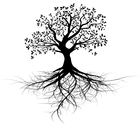 This post will probably only be of interest if you are thinking of self-publishing your work at some point but hopefully it will reach a few of you. Let me start by saying that I am a beginner. I set out on this writing journey armed with a pen and paper and a basic understanding of Word but I knew nothing about advanced formatting, web-design, blogging, posting images online (I don't even have a Facebook account). So when I decided to self-publish, the first thing I did was make a list of what I wanted to achieve and then drew up a timetable. This has been invaluable and I would recommend anyone thinking of going down this path to do the same as it can feel overwhelming when you are starting out. Having that piece of paper can help keep you calm. I also set a 'launch' date and worked back from there. My book is in the supernatural genre so it makes sense to publish early autumn, ready for Halloween and Christmas. I made the decision to self-publish at the end of January so have given myself plenty of time. Here's my list: 1 Finish manuscript. 2 Have text copy edited by a third party (this will cost). 3 Understand how CreateSpace and Kindle Direct Publishing (KDP) work. 4 Decide whether to stick with Amazon (which owns both CreateSpace and KDP) or to publish on other platforms. (As my learning curve is so steep, I have decided to deal exclusively with Amazon for now and to ignore other platforms until I have a better idea what I am doing.) 5 Build website and blog (work out cost). 6 Choose title and design book cover (or outsource book cover design - work out cost if outsourcing). 7 Begin to think about how to market the book (libraries, universities, local press, online, printed material? Again, consider costs). 8 Decide on a launch date and whether to have an event (and price it up). 9 Register for public lending rights if book to be stocked in a public library. Each of the above points has its own sub-list. In today's post I will look at point 1 (manuscript) and also touch on point 3 (understanding CreateSpace and KDP). The others I will save for another day. As soon as I made the decision to self-publish I jumped straight into point 3 (understanding CreateSpace and KDP). The partially completed manuscript was put aside for about three weeks while I wrapped my brain around what I was thinking of undertaking. I made the decision to self-publish at the end of January this year. At that time I had completed six of the eight stories and I was trying to decide whether to send them off to agents and publishers. But my research showed that many agents didn't accept unsolicited collections of short stories and then someone mentioned CreateSpace. I had heard of 'e-publishing' and 'self-publishing', of course, but what I hadn't realised was how accessible it was. Further, I discovered that Amazon didn't just have a facility for publishing e-books (via KDP) but also had a sister company which enabled people to generate good quality print copies of their books (CreateSpace). This was an important moment as I wanted to create a physical book, something I could pass around relatives who don't use e-readers, something I could sign, and/or give as a gift. I also think that spooky tales work well when read from crinkly yellow paper. (Plus self-published titles never go out of print. They are printed on demand each time an order comes in and so do not disappear even if sales are low.) Tip: What I should have done next was visit the CreateSpace website (www.createspace.com) and set up an account. (It's free - just a username and password required). Once you have an account you can see the steps that need to be completed (see the picture above for a snapshot of my member dashboard) and it gives you a clearer idea about what you are undertaking. Even if you do not set up an account, you can download a Word template from the CreateSpace website which you can then use for your manuscript. I didn't do this. I thought that I would finish my manuscript first. This is not necessary and I would recommend that anyone who is serious about going down this route considers setting up an account early in the process. At least take a look around the website and the Word templates available. Update: one thing I have found with book 2 is that if I type my WIP straight into the CreateSpace Word template it is not very efficient from a printing and reviewing perspective as you only get a few hundred words per page (as it is set out like the real book). You can increase the size of the fonts so that each page fills a side of A4 (by going into print/scale to paper size/A4) which makes it bigger and easier to read on paper but you still only end up with the same word count per page. I can see this becoming frustrating and so I may actually revert to my previous practice of pasting my WIP into the template when it is at an advanced stage but you may feel differently. I suppose the message is that if you haven't done this before, this will only really make sense to you if you take a look at the templates, play around with them and see what works for you. What I DID do: I bought an e-copy of 'CreateSpace & Kindle Self-Publishing Masterclass' by Rick Smith and read through it. From this I learned that my manuscript needs to be formatted differently for the printed book and the e-book (after all, they are two very different platforms). If you are planning on producing both a physical book and an e-book (like me) Mr Smith recommends starting with the CreateSpace version as Amazon has a facility which then automatically converts the CreateSpace manuscript into a version which is compatible with KDP. I decided to follow this advice. Please note that the version I have of this book (2nd edition 2015) does not contain up-to-date information regarding the US/UK tax position. I assume Mr Smith will update but if you find a version which says anything other than 'use the online Amazon form and input your NI number' then double check you have the most recent information available as the process has been significantly simplified and a few minutes filling in an on-line form should do the trick if you have no other connection with the US. I also began looking at how other books were being presented/designed and taking pictures of (and measuring!) the ones that I liked. It might seem like you are getting ahead of yourself if you haven't even finished writing your book but if you want to download the formatted Word template from CreateSpace and work directly into it, you need to know what size your book is going to be (ie the 'trim' size). I have chosen 5" x 8". With my next book, I will decide on a trim size at the outset, download the Word template from CreateSpace and work directly into it. (Update: please see my comment above regarding the use of the template during the WIP stage). As it stands, I have had to copy and paste my manuscript into the template (although it hasn't given me too many problems at all and I may actually revert to this practice given the issues arising as I edit - please see above). Please note that you do not have to use the template provided by CreateSpace but you will need a reasonably sophisticated knowledge of book formatting if you decide to go it alone. The template provided sets out the print margins, chapter breaks, contents page etc for you so all you have to do is provide the words. It was the obvious choice for me. Tip: Try and keep manual tabs/indents out of your manuscript. Apparently they can cause problems. I was aware of this and spent a couple of hours taking them out and using the rulers to set the paragraph indents. I then used the 'central justify' button to set up the asterisks I am using to denote certain scene breaks so there is not a manual 'tab' in sight. Tip: Ensure that you have not used a document which at any time has contained a table of contents in Word. This contains hyperlinks which can cause problems. The table of contents in the Word template you download from CreateSpace requires you to manually enter the page numbers into the table. Update - this is intended for straightforward fiction manuscripts by beginners who wish to make things as easy as possible. Tip: You will need to decide upon font size and type and also the spacing between lines so have a good look at the insides of the books you are wanting to emulate and see if you can work out how they have been put together. Rick Smith's book contains some advice. Once you have your Word template you can play around with font sizes and spacing (and indents etc) as much as you want. Each time I make a change I print out a few pages and compare them with published books to see what it looks like (as it prints out at the same size as the finished book). There is no harm in getting a feel for how you want to lay out your book even if you haven't finished writing it. It can provide a nice break from writing and the time spent will not be wasted. There is a lot of information to take in and decisions to make and it helped me to know what these were while I finished my manuscript. It took my brain a while to digest all the information and I have done this gently, over a period of time which I think is better than cramming it once the manuscript is ready to go. In Summary
Now my manuscript is in hand (pasted into the CreateSpace template and ready for a copy edit) I am wrestling with designing my book cover and (mostly) enjoying it. I will post separately on this in a few weeks. Thanks for reading (if anyone got this far!) and happy writing.  So my first post... I've been putting this off for a while, going over and over in my head what I should say to get my blog up and running. Should I introduce myself? Set out my mission statement for the year (do I even have one?)? Or should I post a book review? After all, it was meeting some lovely and inspiring book bloggers on Twitter which has encouraged me to give book blogging a go. I guess it doesn't really matter how I start, it's more important that I ACTUALLY START! Let's face it, I'm a little late to the party - how many people are going to read this post? My Mum and Dad and my brother, if I am lucky. I suppose it's more for me; to see if I can do it and for the enjoyment of recording my thoughts on the books that I read and the ones that I am creating. I wanted to call my website 'About a Book', hence the strange little logo thingy that is hanging around on some of the pages, but that domain name is already taken. It still sums up this blog, though, as it is going to be about whatever pages have engaged me that day, whether it be reading the work of another or toiling away happily on some of my own. I've joined Goodreads and have set up a list of books to be read. It would be great to see you over there. My list is eclectic and I can't wait to get stuck in. If you have any recommendations, please do pass them along. In terms of my writing, I do have a plan. I have now completed eight supernatural stories which will make up my first book, 'Into Dust' (to be self-published in the Autumn). The stories vary in length and tone but each has a supernatural element. I am still surprised that I have found myself writing in this genre and enjoying it so much but I find the atmosphere, the darkness and light, truly absorbing. I hope this comes across in the stories. I will post extracts on the 'Into Dust' page soon. At the moment it contains cover design ideas - do pop over and let me know which one you prefer. Some of my earlier (non-supernatural) stories are available as pdfs on the 'Other Things to Read' page. I hope to post more as I go along including work from other people as it would be great to give others some exposure if I get enough readers through. In the meantime, I am aiming for a release date of early/mid September for the book and I'll publish some posts on how I find the process, highlighting any tips or tricks I discover. And if anyone out there has any advice please, please do share. I'm a little apprehensive - some say it is easy, others say differently. Either way, there are going to be decisions to make, hurdles to leap and a lot of coffee drunk along the way. Yikes. |
Bernadette KeelingI love most types of fiction - crime, mystery, fantasy. Oh, and historical fiction of course and middle-grade books and, well, you get the picture. Subscribe for Blog updates via email:Categories
All
Archives
April 2019
Unique, handcrafted items for readers and writers:
|
B.M. Keeling
